
🧽 The Difference Between "Clean" and "Show Ready"
Every car at a show looks clean from ten feet away. That's not the bar. The bar is what happens when someone leans in close, catches the light at the wrong angle, and finds swirl marks in your clear coat or dust in your wheel wells. That's the gap between "I washed it this morning" and "I detailed it."
Detailing isn't washing with extra steps. It's a process, done in a specific order, with the understanding that every step you skip shows up under direct sun or show lighting. Rush it and you'll spend three hours cleaning a car that still looks like it was cleaned in twenty minutes.
This is the full breakdown: what to do, in what order, what tools are actually worth buying, and where people torch their own results by rushing the timeline.
📅 Start the Clock Two Days Out, Not the Morning Of
The single biggest mistake in car show prep is compressing everything into show morning. Paint correction, wax cure time, and interior deep cleans all need hours you don't have if you start at 6am for a 9am show.
Here's the realistic timeline:
- 2-3 days before: Wash, decontaminate, and do paint correction if you're doing any. Machine polishing and compound work should never happen the night before, since you want time to inspect your work in different lighting.
- 1 day before: Wax or sealant application (many need hours to cure, and some ceramic products need 12-24 hours before their first wash), interior deep clean, engine bay if you're doing one.
- Morning of: A quick rinse-free wash or waterless detail, wheels and tires, glass, final wipe-down, and a walk-around inspection under natural light.
If you only have one day, cut paint correction, not the wash and decontamination steps. A swirl-free but unwaxed car still reads clean. A waxed car with bonded contamination under the wax looks hazy no matter how much product you put on it.
🚿 Step 1: The Wash (Where Most Damage Actually Happens)
More swirl marks come from bad wash technique than from anything else you'll do to your paint. Get this step right and half your correction work disappears.
- Two-bucket method, minimum. One bucket with soap, one with clean rinse water, both with grit guards at the bottom. Dunk your wash mitt in the rinse bucket before reloading it with soap, every single time. This is the single cheapest upgrade you can make to your wash routine.
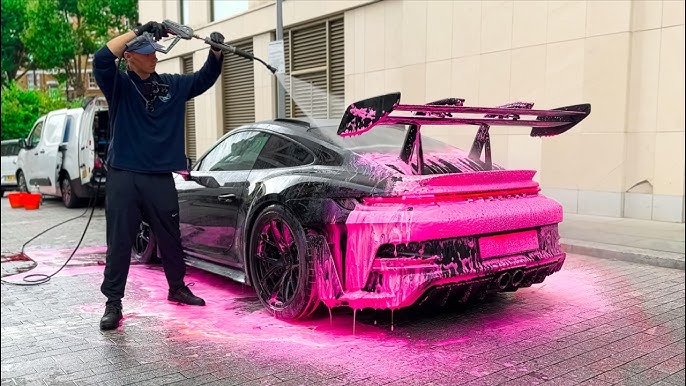
- Snow foam or pre-rinse first. The goal is to lift as much loose dirt and grit off the surface as possible before a mitt ever touches the paint. Skipping this step means you're dragging dirt across your clear coat with every pass.
- Wash top to bottom, panel by panel, using straight lines instead of circular motions. Circular scrubbing is one of the most common causes of swirl marks people never trace back to their wash technique.
- Separate mitts for wheels. Brake dust is abrasive and metallic. Using your paint mitt on wheels and then back on paint is asking for scratches.
- Dry with a proper drying towel or a leaf blower/air dryer, not a bath towel from the house. A quality microfiber drying towel or waffle-weave towel lifts water instead of dragging it, which matters more than people think.
🧴 Step 2: Decontamination (The Step Most People Skip Entirely)
Washing removes surface dirt. It does not remove bonded contamination: embedded brake dust, tar spots, tree sap, rail dust, industrial fallout. That stuff sits on top of your paint like tiny bumps you can't see but can absolutely feel.
- Run the plastic baggie test. Put a sandwich bag over your hand and glide it across a washed, dry panel. If it feels gritty or bumpy instead of glass-smooth, you have bonded contamination.
- Iron/fallout remover dissolves embedded metal particles (usually brake dust). Spray it on, watch it turn purple as it reacts, then rinse. Do this before claying.
- Clay bar or clay towel physically lifts everything else. Always use it with a dedicated lubricant, never dry, and always fold to a clean section of clay as it picks up grime, or you're just dragging the contamination back across the paint.
Skip decontamination and every product you apply after this point, wax, sealant, ceramic, is bonding to a rough surface instead of a smooth one. That's why some "detailed" cars still look hazy under direct light: the wax is sitting on top of contamination, not on clean paint.
✨ Step 3: Paint Correction (Optional, But This Is What Separates Show Cars From Clean Cars)
If your paint is swirl-free and you're just maintaining it, skip this step and go straight to protection. If you've got a car with a few years of wash-induced swirls, water spots, or light oxidation, this is where you actually fix it rather than hide it.
- A single-stage polish with a dual-action polisher and a finishing pad handles light swirls and adds gloss without being aggressive. This is the entry point most people should start at.
- Compounding is for deeper defects: heavier swirls, light scratches, oxidation. It's more aggressive and removes more clear coat, so it's a tool for problems, not a routine step.
- Test a hidden panel first. Every paint reacts differently to product and pad combinations. A door jamb or under-the-fuel-door panel is a safe place to dial in your process before you touch a hood or fender.
- Don't skip the inspection. Wipe the panel down and check it under a bright light or the sun, not just the shade of your garage. Garage lighting hides swirls that show up instantly outdoors.
If you don't own a polisher and this is a one-time show prep, it's genuinely fine to skip correction and lean on protection product gloss instead. A clean, contamination-free, well-waxed car with light swirls still reads well at a show. What kills you is skipping the wash and decon steps to rush toward a wax that goes on over dirty paint.
🛡️ Step 4: Protection (Wax, Sealant, or Ceramic)
This is the step that gives you the deep, wet look under show lighting, and it's also the step people rush because it feels like the "fun" finishing touch.
- Carnauba wax gives the warmest, deepest look but lasts weeks, not months. Good if you're prepping specifically for one show and want maximum gloss that day.
- Paint sealant lasts longer (months), looks slightly more "crisp" than warm, and is more forgiving for beginners.
- Ceramic coating is the long-term option, but it's not a same-week show prep product if you're applying it yourself for the first time. Most ceramic coatings need a controlled environment and real cure time, and doing your first application two days before a show is how people end up with high spots and streaking under lights.
- Whatever you use, apply thin, even coats and follow the cure time on the label. More product does not mean more protection, it means more time buffing off haze.
🛞 Step 5: Wheels, Tires, and the Details People Actually Check
Judges and fellow enthusiasts look at wheels and tires before almost anything else, because they're the fastest tell for how thorough someone actually was.
- Clean wheel barrels, not just faces. Brake dust builds up behind the spokes and it's the first place a trained eye looks.
- Dress tires with a satin finish, not the glossy "wet look" gel unless that's specifically your style. Overly glossy tire dressing slings onto rocker panels and paint the second you drive, and it reads as try-hard under daylight.
- Clean the lug nuts and hardware individually if you're going for a full show finish. It sounds excessive until you see the difference next to a car that skipped it.
- Don't forget the wheel wells and inner fenders. Most people wash the wheel face and completely ignore the well behind it.
🚗 Step 6: The Interior and Engine Bay
A spotless exterior with a messy interior or a dusty engine bay tells people you cared about the parts that photograph well and skipped the parts that don't.
Interior:
- Vacuum seats, carpets, and trunk, then get into seams and crevices with a detail brush or compressed air.
- Clean glass with a dedicated glass cleaner, not an all-purpose spray, and use separate towels for glass versus everything else so you're not spreading residue.
- Wipe down and condition trim and leather, but don't overdo silicone-heavy dressings on the dash. A satin finish beats a greasy shine that reflects glare through the windshield.
- Don't forget door jambs and the trunk seal area. It's the first place a close inspection reveals whether you actually detailed or just vacuumed.
Engine bay (only if you're comfortable, and only with the engine cool):
- Cover sensitive electronics and the alternator with plastic bags before spraying anything.
- Use a degreaser on a cool engine, agitate lightly with a brush, and rinse gently with low pressure, never a direct high-pressure blast into the bay.
- Dress plastics and hoses lightly for a clean, non-greasy look. This is a step judges at real shows check closely, and it's one almost nobody does for a regular meet, so it's an easy way to stand out if the show calls for it.
⏱️ The Morning-Of Routine
By show morning, the heavy lifting is done. This is maintenance, not a full detail.
- A quick rinseless or waterless wash to knock off overnight dust, especially if the car sat outside.
- Re-dress tires if they picked up dust in transit.
- Glass touch-up, since fingerprints and dust show up fast on windows.
- A final walk-around in daylight, not garage light, checking panel gaps, wheels, and anything that got missed.
- If you're driving to the show, budget time for a quick wipe-down on arrival. Road grime and bugs happen even on a short drive.
📸 Spota Tip: Detail Before You Shoot, Not After
If you're planning to knock out a Photo Op or two while you're at the show, or logging progress pics to your car's Garage timeline, do it once the car is fully detailed and before the crowd shows up. Morning light plus a freshly detailed car is the combination that actually makes photos look like they belong in a magazine instead of a parking lot. Waiting until the lot fills up means dealing with reflections, other people's cars in frame, and foot traffic you can't crop out.
🚫 The Mistakes That Undo Everything Else
- Waxing over dirty or contaminated paint. You'll lock haze and grit under a glossy layer, and it'll look worse under direct light than paint you didn't wax at all.
- Using dish soap to wash. It strips wax and protection faster than you can reapply it. Use an actual pH-neutral car wash soap.
- Circular motions with a wash mitt. Straight lines only. Circles are how swirl marks get their name.
- Skipping wheel wells and door jambs. These are the first places a close look reveals corner-cutting.
- Applying ceramic coating the night before a show for the first time. Give any new product a real test run before you're depending on it for show day.
- Overusing glossy tire dressing. It slings onto rockers the moment you move the car.
- Not budgeting cure time. Wax, sealant, and ceramic all need time to bond. Rushing this step is the most common reason a "detailed" car still looks streaky in photos.
The Bottom Line
A show-ready car isn't about owning every product on the market. It's about doing the boring steps, wash technique, decontamination, cure time, in the right order and not skipping them because they're less satisfying than watching wax shine up under a garage light. Do the prep two days out instead of two hours out, and the car will do the talking for you when someone leans in close.
Related reading: check out our guide on prepping for your first car meet for what to bring beyond the detail itself, or browse how-tos for more practical guides built for people who actually drive their builds.