
☀️ The Scratches You Can Only See in the Sun
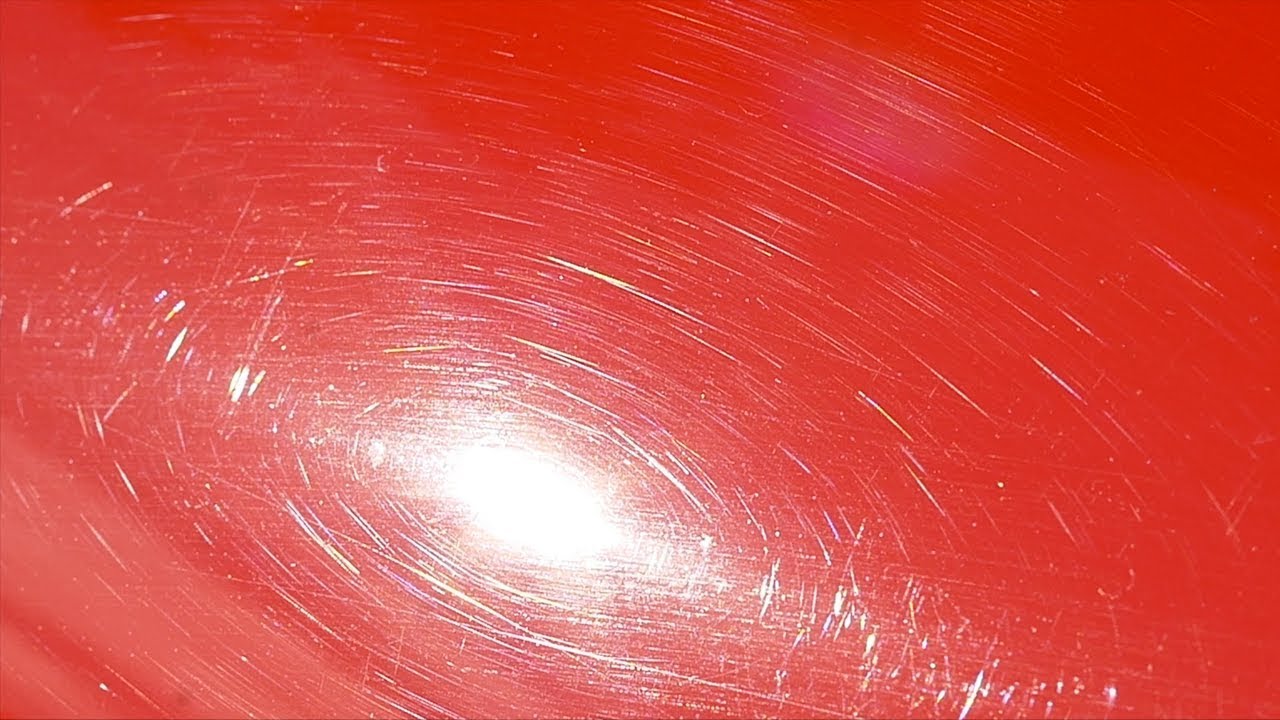
Pull a dark car, black, navy, deep red, into direct sunlight at the right angle and something happens that never shows up in the garage. The paint that looked flawless five minutes ago suddenly turns into a spiderweb of fine, circular scratches, catching the light in swirling patterns across every panel. Step back into the shade and they vanish. Drive it to a car wash for a "quick clean" and somehow there are more of them next time.
This is the moment every car guy has had at least once, standing in a parking lot at golden hour, staring at paint he thought was perfect, watching it reveal a network of hairline damage he never noticed before. It's not dirt. It's not a reflection. It's real, permanent damage sitting in the clear coat, and the sun is just the only light source honest enough to show it.
Swirl marks are one of the most misunderstood problems in car culture. Owners blame the car wash, blame road debris, blame "just getting old," when the actual cause is almost always something the owner did themselves, with a sponge, thinking they were being careful. Understanding why takes the mystery out of it and explains why an entire paint correction industry exists to fix a problem most people don't realize they're causing.
🔬 What Swirl Marks Actually Are
Modern car paint isn't one layer, it's a system. Underneath is the base coat, the layer that actually carries color. On top of that sits the clear coat, a thin, transparent layer of hard resin whose entire job is to protect the color coat from UV light, chemicals, and physical abrasion while giving the paint its glossy depth.
Swirl marks live entirely in that clear coat. They're micro-scratches, thousands of them, each one so shallow it barely registers as a scratch to the naked eye under normal light. Individually they're nothing. In aggregate, arranged in the circular or random-orbital patterns left behind by whatever caused them, they scatter light instead of reflecting it cleanly. That's the visual effect: instead of a mirror-flat surface bouncing light back in one direction, a swirled panel bounces it in a thousand directions at once, which is exactly what a spiderweb pattern under direct sun looks like.
Crucially, this is physical damage, not a film sitting on the surface. That's the single most important thing to understand about swirl marks, and it's the thing that trips up almost every new car owner:
- Washing removes dirt. It does not remove swirls. No amount of soap, water, or rinsing touches damage that's already carved into the clear coat.
- Wax and sealant don't remove them either. They can fill and mask light swirls temporarily, giving a glossier look for a wash cycle or two, but the scratch is still there underneath. Once the wax wears off, so does the illusion.
- The only fix is removing material. The clear coat around the scratch has to be leveled down to the depth of the scratch itself, which means the surface actually gets thinner. There's no way around that physics.
That last point is why paint correction isn't something people do casually, and why doing it wrong is worse than doing nothing at all.
🧽 The Wash Mitt Is the Real Villain
Ask most owners how their paint got swirled and they'll guess automatic car washes, and sometimes they're right, the brushes at a tunnel wash are notorious for dragging grit across panels at speed. But the more common culprit, by a wide margin, is the owner's own hand wash routine.
Here's the mechanism nobody thinks about: dirt, dust, and road grime are abrasive at a microscopic level. Every time a wash mitt or sponge drags across the paint, it's not just moving soap around, it's dragging whatever trapped particles are caught in the mitt across the clear coat like fine-grit sandpaper. A single wash with a dirty mitt, using swirling circular motions, going back over the same panel repeatedly, will introduce hundreds of new micro-scratches in fifteen minutes.
The classic mistakes that build swirls over years of "careful" washing:
- Reusing the same wash mitt without rinsing it out constantly. Every pass picks up more grit and redeposits it on the next panel.
- Washing in circular motions. This is counterintuitive because it's what most people are taught, but circular scrubbing is exactly what creates the circular swirl pattern. Straight, front-to-back motions in one direction concentrate any scratching in a single line that's far less visible than a circular pattern.
- Drying with an old bath towel or a shirt. Cotton terrycloth is genuinely abrasive against clear coat. It's one of the single worst tools in a garage for a car someone claims to care about.
- Dry-wiping dust off instead of rinsing it away first. Wiping a dusty hood "real quick" before a drive is one of the most common swirl-inducing habits there is, because that dust is doing the same sandpaper job a dirty mitt does.
- Tunnel washes with cloth or brush systems, especially ones that don't replace their materials often, which accumulate grit from every car that's gone through before yours.
The uncomfortable truth is that a car that's never been to a single automatic wash, hand-washed exclusively by an owner using the wrong technique for ten years, can end up more swirled than a car that's been through a dozen touchless washes. Technique matters more than venue.
🧴 What Actually Removes Them: Paint Correction
Paint correction is the process of mechanically leveling the clear coat to remove the scratch layer, and it's a real skill with real equipment, not a product you spray on.
The typical process:
- Wash and decontaminate first. Any remaining grit has to come off before machine work starts, or the polishing pad just grinds that grit into the paint and creates new damage. This often includes a clay bar pass to pull out bonded contaminants that washing alone won't remove.
- Machine polish with an abrasive compound. A dual-action or rotary polisher, running a cutting compound on a foam or wool pad, physically abrades the clear coat surface down to the depth of the swirls, leveling the high points around each scratch until the surface is uniformly flat again.
- Refine with a finishing polish. The cutting stage can leave its own fine haze, called micro-marring, so a second, less aggressive pass with a finishing polish brings back true, deep gloss.
- Protect the freshly corrected surface. A wax, sealant, or ceramic coating goes on immediately after, because bare, freshly polished clear coat with no protective layer is exposed and vulnerable to being swirled right back up on the very next wash.
A proper single-stage or multi-stage correction, done by hand tools or a machine, by an owner or a professional detailer, typically runs anywhere from a couple hundred dollars for a single-stage job on a lightly swirled daily driver to well over a thousand for a full multi-stage correction on a show car with heavy defects. The labor is real: a thorough correction on a full-size sedan can take a professional six to ten hours, panel by panel, checking work constantly under raking light to make sure nothing's been missed or over-corrected.
Spota tip: a before-and-after paint correction, shot under the same harsh sunlight that reveals swirls in the first place, is one of the most satisfying updates you can post to a Garage timeline. The transformation photographs itself.
⚠️ Why "More Correction" Isn't Always Better
Here's the part that separates people who understand paint correction from people who just think harder rubbing equals better results: clear coat is finite. Every correction pass removes a small amount of material permanently. There's no regrowing it.
Factory clear coat typically runs somewhere in the range of 40 to 60 microns thick, and a single aggressive correction pass can remove anywhere from a few microns to well over ten, depending on the compound and pad aggressiveness used. That sounds tiny, and it is, but it's not infinite. A car that gets a full aggressive correction every year for its whole life will eventually run out of clear coat to safely remove, at which point further correction risks burning through into the base coat or, worse, straight to bare metal or primer, a mistake that turns a scratch problem into a full repaint problem.
This is why experienced detailers measure clear coat thickness with a paint depth gauge before ever picking up a machine, and why they'll refuse to fully correct a panel that's already been corrected heavily in the past or one that shows signs of a bad prior repaint with thin clear coat. It's also the real argument for prevention over correction: every swirl avoided in the first place is clear coat that never has to be sacrificed to remove it.
🛡️ The Ceramic Coating Connection
A lot of the recent obsession with ceramic coatings ties directly back to swirl marks. A quality ceramic coating doesn't prevent swirling entirely, nothing does if you wash wrong, but it adds real hardness to the surface and, more importantly, gives paint a slicker, more hydrophobic surface that resists the kind of grit adhesion that causes scratching in the first place. Dirt and grime bead and slide off a well-maintained ceramic surface instead of grinding in during a wash.
It's also why the correction-then-coating pipeline has become the standard move for anyone serious about keeping a build swirl-free long term: correct the paint once to a clean baseline, then lock that baseline in under a coating, then commit to safe wash technique going forward so the whole cycle doesn't have to repeat every eighteen months.
🚗 Prevention Is the Whole Game
The realistic long-term answer to swirl marks isn't "get it corrected every year," it's washing in a way that doesn't create them in the first place:
- Use the two-bucket method. One bucket of soapy water, one bucket of clean rinse water for the mitt, so grit gets rinsed out of the mitt between every panel instead of ground back into the paint.
- Wash in straight lines, not circles, and use minimal pressure, letting the soap and lubrication do the work instead of scrubbing.
- Use a dedicated wash mitt and drying towel, microfiber only, never a household sponge or bath towel.
- Dry with a proper drying towel or a leaf blower / air dryer, not a wipe-and-hope towel pass. Blotting instead of dragging matters.
- Rinse dust off before ever touching a dry panel with a cloth.
- Skip questionable automatic washes on a car you actually care about, or at minimum, know which local ones use touchless systems.
None of this is complicated. It's just slower than the habits most people default to, and slow is exactly what swirl-free paint requires.
Swirl marks aren't a mystery and they aren't inevitable. They're a direct, physical record of how a car has been washed, dried, and handled over its life, showing up in the one light source that doesn't lie. Fix the technique and the correction you paid for actually stays fixed instead of turning into an annual tradition.
Wash it right the first time, and the sun becomes something your paint shows off for, not something it hides from.